 Low Rider Dog
How I Built a Dachshund Ramp Beside My Deck Stairs
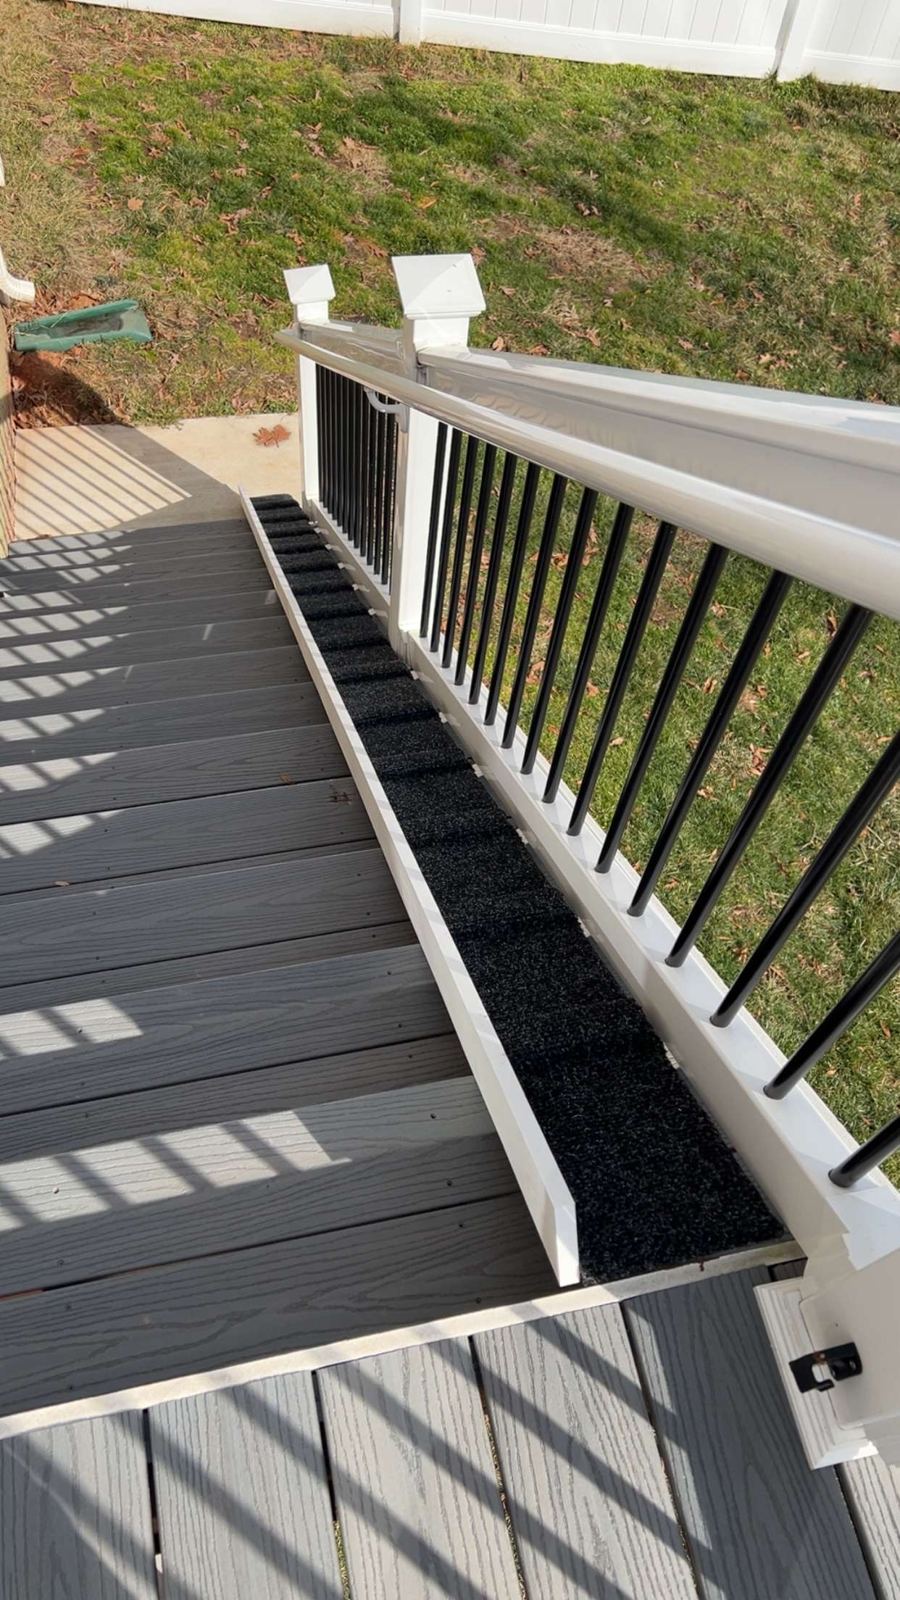
I'm a maintenance mechanic, so when something isn't working right, my first move is to build a fix. This one started when Brew, my light-brown dachshund, was a puppy. He couldn't do the deck steps at all. Those stairs are built for people, and for a tiny dog with a long back and short legs, every step is a jump.
So I built him a ramp right alongside the stairs. I've built several of these now, and this page walks through how I do it: what I use, what it costs, and what I've learned. No fancy tools, no special skills. If you can run a drill and a staple gun, you can build one this weekend.
Do Dachshunds Need Ramps?
You don't have to have one, but there's a good reason so many dachshund owners do. The breed's long spine and short legs put them at higher risk for intervertebral disc disease (IVDD), a back problem that can be painful and expensive to treat.
VCA Animal Hospitals calls spinal health "the most important concern in Dachshunds," and suggests keeping them at a healthy weight, limiting jumping and restricting stair access. The Cornell University College of Veterinary Medicine lists dachshunds among the breeds predisposed to IVDD and mentions steps or ramps to cut down on jumping as one way to put less stress on the spine.
I'm not a vet, and a ramp isn't a cure for anything. If your dog already has back trouble, or you're not sure what's right for them, ask your vet. For Brew, it started as the only way he could get down to the yard, and it's taken a lot of little jumps out of his day since.
Materials and Prices
I've built several of these, so I can't give you one exact receipt. Here's what the materials cost at Home Depot for a ramp about 8 feet long. Prices were checked on homedepot.com on Oct 26, 2026, and they'll vary by store and over time.
| Item | What it's for | Qty | Price each | Subtotal |
|---|---|---|---|---|
| Veranda 3/4 in. x 11-1/4 in. x 8 ft. PVC trim board (sold as 1x12) | Ramp bottom | 1 | $48.98 | $48.98 |
| Veranda 3/4 in. x 5-1/2 in. x 8 ft. PVC trim (1x6) | Side rails | 2 | $22.47 | $44.94 |
| Veranda 3/4 in. x 1-1/2 in. x 8 ft. PVC trim (1x2) | Treads/cleats | 2 | $7.48 | $14.96 |
| TrafficMaster Elevations 6 ft. wide indoor/outdoor carpet, cut to length | Walking surface | 4 linear ft | $3.61/linear ft | $14.44 |
| Arrow T50 3/8 in. stainless steel staples (1,000) | Carpet | 1 box | $14.97 | $14.97 |
| DECKMATE #9 x 2-1/2 in. exterior deck screws (1 lb.) | Sides and mounting | 1 box | $10.97 | $10.97 |
| Estimated total (8 ft ramp) | about $150 + tax |
A few notes on the list:
- Carpet: The carpet comes 6 feet wide and is cut to whatever length you order. Four feet of it gives you two strips about 2 feet wide and 6 feet long, which covers an 8-foot ramp with one seam. You want them that wide because the carpet wraps around the edges of the bottom board and staples underneath (more on that below). Put the seam over a cleat so it's hidden and held down. If you'd rather have one continuous piece, order a length a little longer than your ramp and cut a 2-foot-wide strip from it.
- Longer ramps: If your stairs need more than 8 feet, you'll need longer boards. Home Depot carries 12 ft and 16 ft PVC trim in some sizes, but I didn't price those, so check your store.
- Already have stuff? If you've got a staple gun, staples or screws in the garage, that knocks the cost down a good bit.
Tools
- Drill/driver (the deck screws come with a star bit)
- Staple gun that takes T50 staples
- Saw: a circular saw or miter saw for the boards, and a utility knife for the carpet
- Tape measure, pencil and a speed square
- Something to work on. I used totes and a work platform.
Step 1: Measure Your Own Stairs
Every deck is different, so measure yours before you buy anything:
- Rise: Measure straight down from the top of the deck boards (where the ramp will start) to the ground or landing (where it will end).
- Run: Measure how far out the stairs reach from the deck. That's about how much ground your ramp will cover if it runs alongside them.
- Length: Lay a tape from the top edge down to the landing spot at the angle the ramp will sit. That's roughly your board length. Add a few inches so you can trim to fit.
The longer the ramp is for the same rise, the gentler the slope. A gentle ramp is the whole point, so if your measurements come out steep, plan for a longer ramp or a landing spot farther out.
Step 2: Build It Somewhere Comfortable
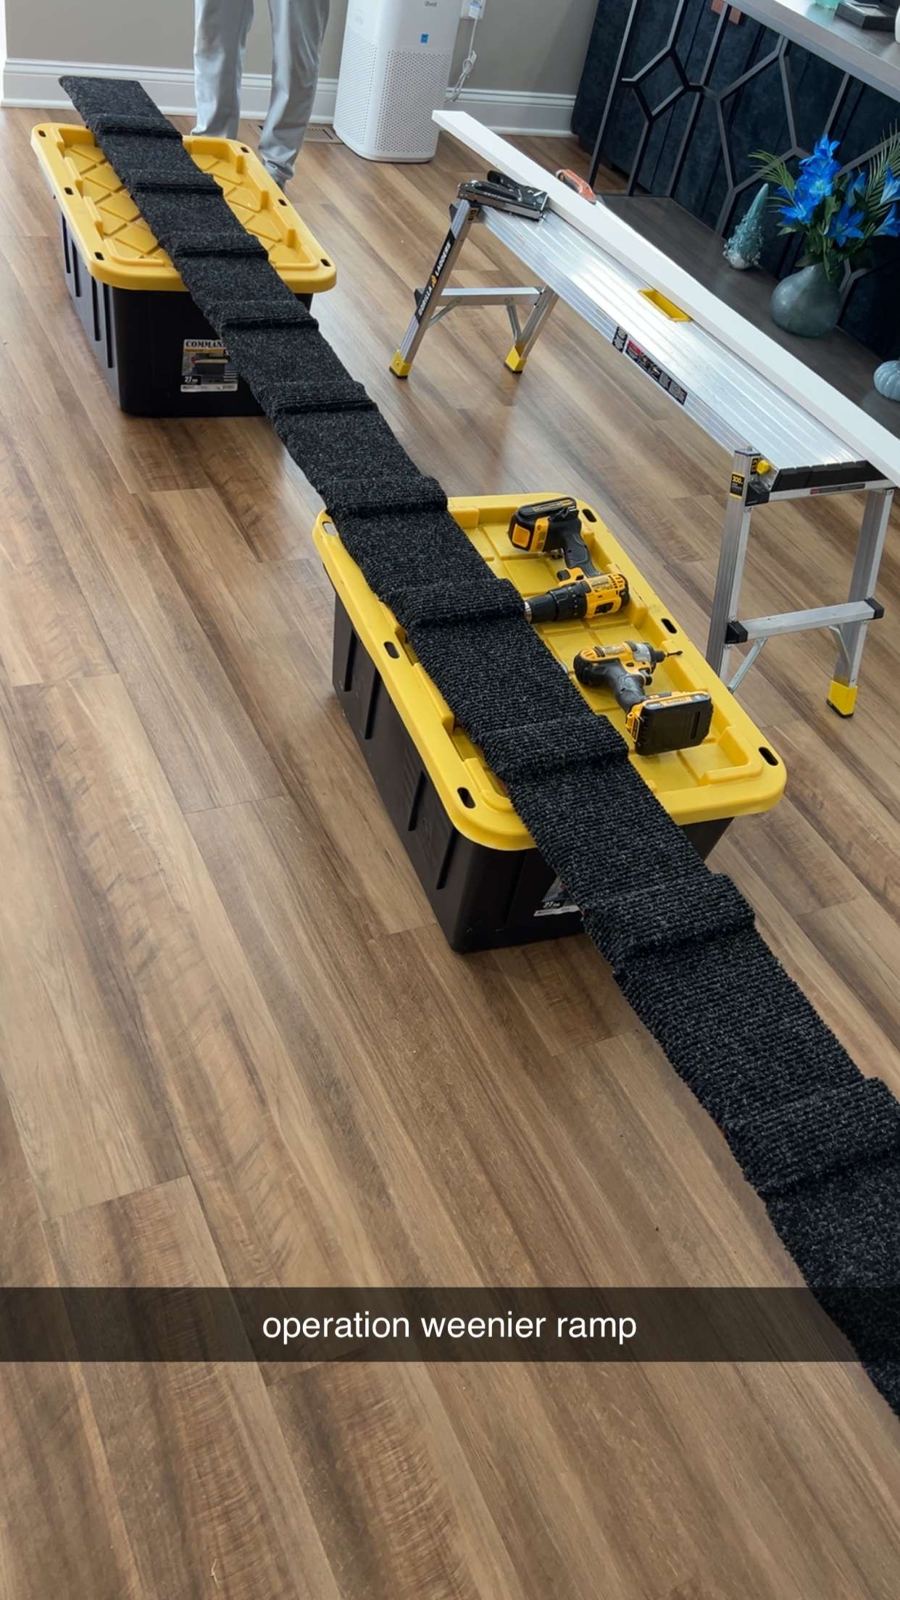
I don't build these in place. I lay the bottom board across a couple of totes and a work platform so I'm working at a comfortable height. I called the project "operation weenier ramp."
The order matters here: cleats and carpet go on before the side rails. That's the trick that keeps the carpet from ever coming loose.
- Cut the bottom board to length.
- Cut the cleats. Cut the 1x2s to the full width of the bottom board.
- Fasten the cleats across the ramp, evenly spaced from top to bottom. These give paws something to push against, so make sure they're solid.
Step 3: Carpet It Tight
Start at one end of the ramp, pull the outdoor carpet tight, and staple as you go, working your way to the other end. Wrap it around both long edges onto the underside and staple it there too. I also put staples into the sides of the cleats to keep the carpet secure. Staple anywhere the carpet wants to lift. Because the carpet wraps the edges and is stapled underneath, there's no loose edge on top for claws to catch or for weather to peel up. Trim the extra with a utility knife.
Step 4: Add the Side Rails
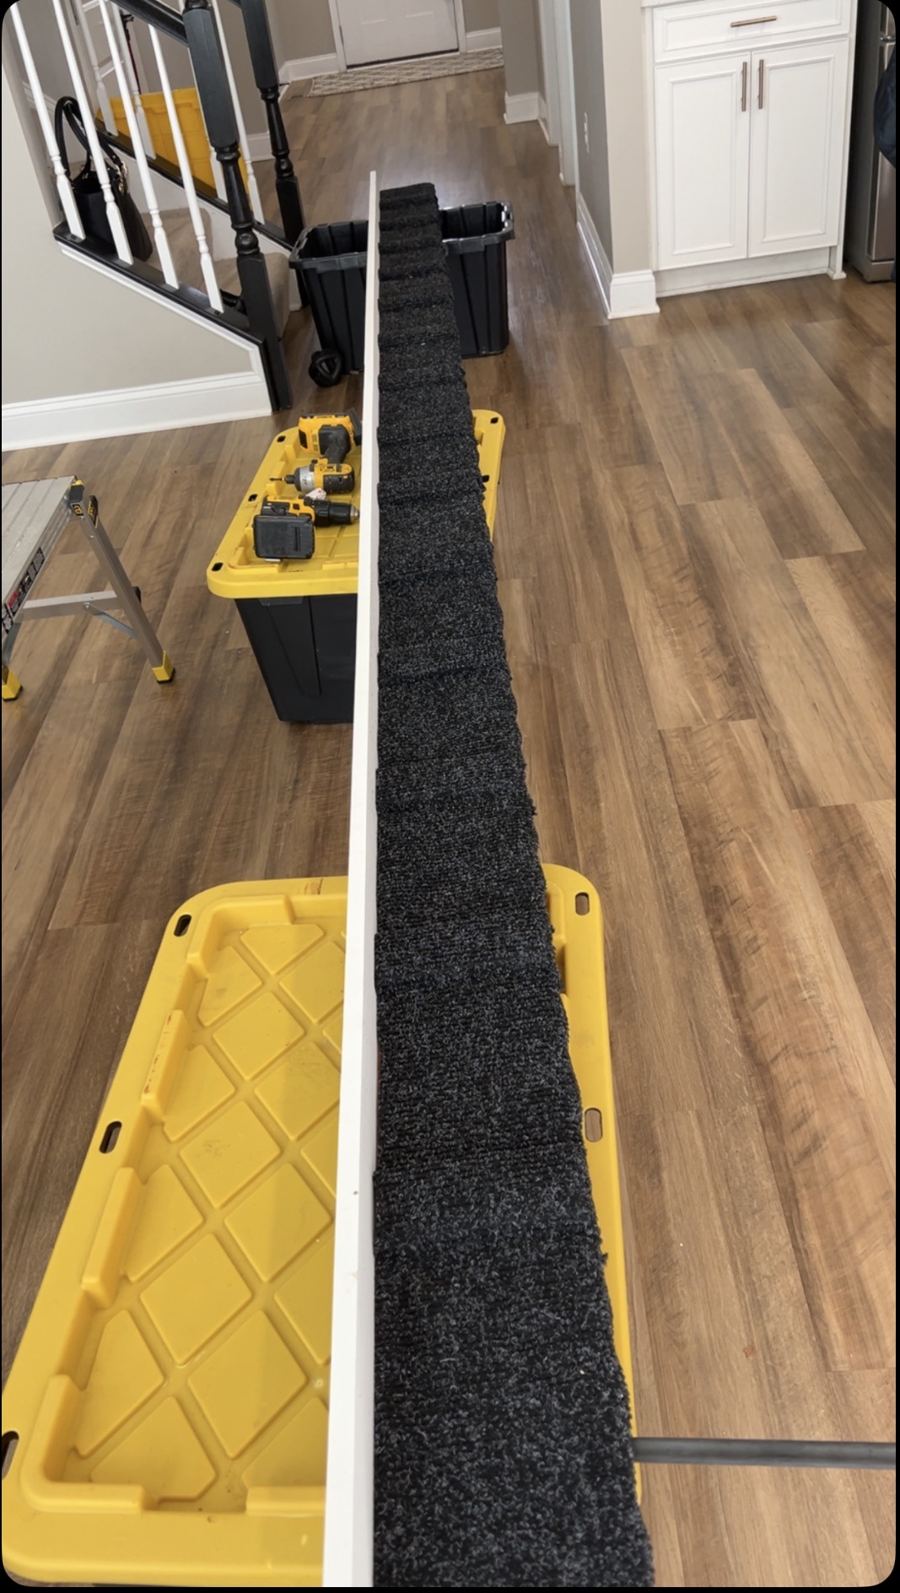
Now screw a 1x6 along each long edge of the bottom board, right over the wrapped carpet, so the sides stand up above the walking surface. The rails pinch the carpet edges in place for good, and they keep your dog from stepping off the edge, especially on the way down.
Step 5: Mount It to the Deck
Carry the ramp out and set it beside the stairs. Mine runs right along the white handrail with the black balusters. Check that the top sits flush with the deck so there's no lip, then screw it into the existing deck structure so it can't shift or slide. Give it a good push and pull before your dog ever sets foot on it.
Tips From Building Several of These
- Keep the slope gentle. If it looks steep to you, it's steep to a dachshund. Longer is better.
- Space the cleats evenly. Space them so your dog takes a step between each one instead of tripping over them. Lay a few out and watch how your dog walks before fastening them all.
- Carpet before sides, and wrap it. Wrapping the carpet around the edges and stapling it underneath, then putting the rails on over it, is what keeps it from coming loose. Loose spots and lifted edges are what catch nails. Walk it with your hand before letting your dog on it.
- PVC won't rot. That's the main reason I use it outside. It doesn't soak up rain, so you don't have to paint or seal it, and it'll outlast a wood ramp.
- Use stainless staples and exterior screws. Regular ones will rust out and stain.
- Hose it off when it gets dirty. The outdoor carpet holds up fine.
How Brew Took to It
Brew's 2 now, and he can handle the stairs these days, so he doesn't use the ramp as much as he did as a puppy. When he does, he trots right down it. The side rails keep him lined up, and the carpet and cleats give him grip. The ramp itself has been going strong for almost 2 years now. If you've got a new puppy, a ramp like this is worth building early, and it'll still be there when your dog gets older.
If your dog is unsure at first, walk them on it a few times with a treat at the bottom. Most dogs catch on quick once they realize it's easier than the stairs.
One More Thing for Fellow Dachshund People
When I'm not building ramps, I run PupNpawDesign Etsy shop, where I make custom dachshund shirts from your dog's photo. If you've got a wiener dog you're proud of, take a look. And if you build your own ramp from this guide, I'd love to see it.